

Table of Contents
When it comes to baseboard trim, choosing the right nail size is a crucial step that should be considered. Using the wrong size can result in unsightly gaps or splits in your trim work, causing frustration and wasted time. As a professional carpenter or DIY enthusiast, selecting the proper nail for your baseboard installation is essential to ensure a seamless finish with no visible defects.
In this guide, we will explore common mistakes made when selecting nail sizes for baseboard trim. We will provide expert advice on how to avoid them. Keep reading to learn more about what size nail for baseboard trim you should use for your next project.
Importance Of Nail Size In Baseboard Trim Installation
When installing baseboard trim, it is essential to consider the size of the nails you choose. Using the correct nail size ensures that your trim work will be secure and free from flaws such as gaps or splits. This crucial is necessary to avoid an unsightly finish that detracts from the beauty of your room.
The most common mistake when selecting nail sizes for baseboard trim is using nails that are too short. Inadequate length reduces holding power and increases the risk of splitting or cracking in hardwoods. Alternatively, choosing a nail that is too long can damage walls, affecting both functionality and aesthetics.
To avoid these issues, consult with a professional carpenter or material supplier for guidance on what size nails to select for different types of wood and wall substrates. A general rule-of-thumb also suggests using 2-inch finishing nails if nailing into studs or sole plates. Shorter lengths should only get used where studs cannot be reached directly behind each installation point.

Common Mistakes To Avoid
When choosing nails for baseboard trim, avoiding common mistakes is essential. One of the most significant errors is using nails that are too thick or long. It can cause your trim pieces to split or crack during installation, leading to costly repairs and wasted time.
Another mistake is relying solely on the size of your baseboard thickness when selecting nail sizes. While this may seem logical at first glance, it needs to consider the type of wood you’re working with and how easily it splits under pressure. Selecting a nail size that accommodates both factors for a smooth and seamless finish is essential.
To avoid these common mistakes, consult an expert in carpentry or hardware supplies who can guide you through selecting the suitable nail sizes for your specific project needs.
Taking this step will go a long way toward ensuring your baseboard installation looks flawless and functions precisely as intended. No unsightly gaps, no splitting wood, just perfectly installed trim work that adds value and style to any room in your home or office building.
Determine The Correct Nail Size For Your Baseboard Trim
When determining what size nail for baseboard trim, there are a few key factors to consider.
- The thickness of your baseboard
- The type of wood you are working with
It will play a significant role in selecting the appropriate nail length and gauge.
Too short of a nail can cause instability, while too long of one can damage the material or not provide secure anchoring. While 15-gauge nails (1 ½ inches) commonly secure baseboards, thicker molding may require longer lengths, such as 2 inches or even longer.
It is essential to ensure that you do not use nails that exceed the width of your trim board, as this will split your pieces, causing further damage. A helpful tip when choosing nail sizes is to test different options on scrap wood before installation.
This step can save you time and money by avoiding costly mistakes during installation and ensuring optimal aesthetic results. With these considerations made early on in your project, finding the right size nail for your baseboard trim doesn’t have to be complicated.
Factors To Consider When Selecting Nail Sizes
When selecting nail sizes for baseboard trim, there are a few key factors to consider. Firstly, the baseboard’s thickness will impact the nail size needed. Thicker boards require longer nails to ensure a secure fit. It’s also essential to choose a nail that is sturdy enough to hold up against any potential impacts or shifting in your home.
Another factor to consider is the type of material you’re working with. For example, softer woods such as pine or MDF may require smaller nails than harder woods like oak or maple due to their lower density and susceptibility to splitting.
Additionally, shorter nails may be necessary to avoid damaging the wall if you’re attaching your trim directly onto drywall rather than wooden studs behind it.
Taking these considerations into account when selecting your nail sizes can save time and frustration by avoiding unexpected gaps or splits in your finished product.
Using professional tips and tricks such as these, amateur carpenters can create perfect baseboards. It can get done without requiring expert help from professionals who charge handsomely for installing small parts, albeit this has perks too!
How Do You Nail Baseboard to Molding?
Mark the Studs:
Before starting, locate and mark the studs along the wall where the baseboard will be attached. Use a stud finder for accuracy. Marking the studs ensures a secure attachment and prevents the baseboard from loosening over time.
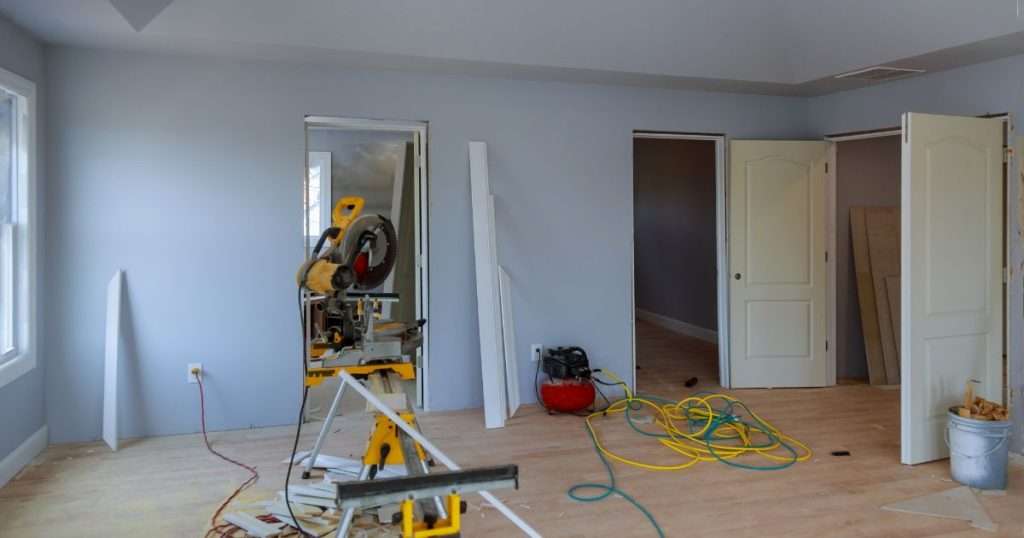
Prepare Equipment:
Gather all necessary equipment to cut the baseboard to size, including a hammer, finishing nails, a level, measuring tape, and a saw. Ensure the baseboard is primed and painted if desired, and have a pencil handy for marking measurements.
Begin Nailing:
Starting at one end of the baseboard, align it with the floor and wall, ensuring it is level. Use the hammer and finishing nails to secure the baseboard to the studs, placing nails approximately every 16 inches along the length. Continue nailing until the entire length of the baseboard is securely attached to the wall. Use a level periodically to check for straightness.
Tips for Ensuring a Seamless and Professional Finish
When installing baseboard trim, attention to detail is essential to achieve a seamless and professional finish.
One of the most crucial steps is selecting the proper size nail for your installation. Using nails that are too small can cause gaps or splits in your trim work, while using too large pins can result in unsightly holes.
To avoid these common mistakes, choosing a nail size that corresponds with the thickness of your baseboards is recommended.
Generally speaking, for thinner boards (up to ½ inch), use 1 ¼ inch nails; for boards between ½–¾ inches thick. Opt for 2-inch nails and wider boards (over ¾ inch). Use larger-size finishing nails.
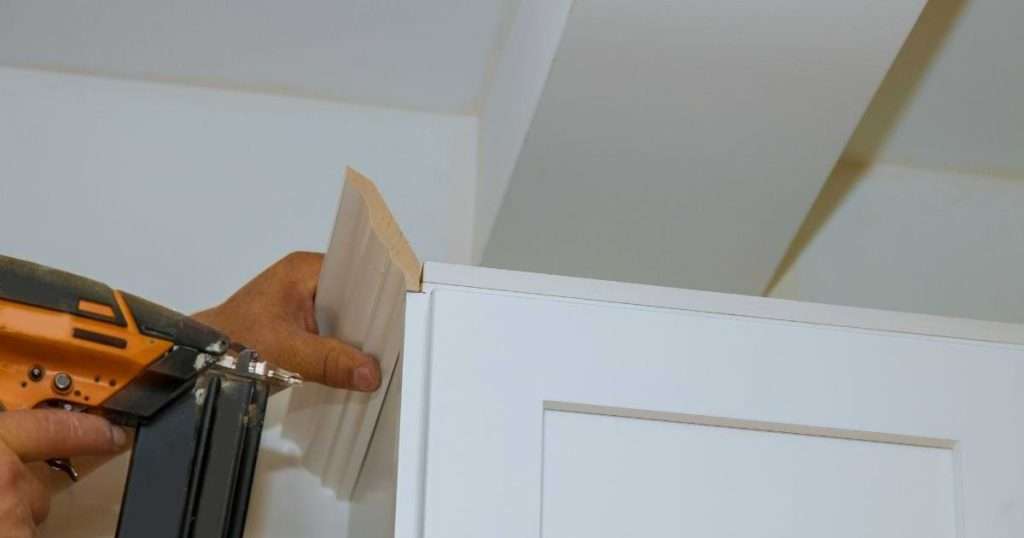
Additionally, consider using a nail gun or pre-drilling pilot holes before hammering in the final screws, as this will help prevent splitting or damage. You can ensure a flawless-looking installation every time by carefully selecting your nail sizes and applying proper installation techniques like pilot-holing or nailing with precision.
Those who take pride in their carpentry ability should ensure to notice such an essential detail when working on their next home improvement project.
Other Fastening Options For Baseboard Trim
While nails are a standard fastening option for baseboard trim, there are several alternatives that you may want to consider. These include adhesives such as construction adhesive or liquid nails, brad nails, and finish nails smaller in diameter than standard framing nails. Using a nail gun with these types of nails can also increase efficiency while minimizing the risk of splitting.
Another option is to use screws instead of nails. It can provide added durability as screws have a stronger hold than traditional finishing nails.
However, ensuring the screw head is flush with the trim’s surface is essential to avoid unsightly gaps or damage during sanding and painting.
Regardless of your chosen securing method, selecting quality materials that complement your home décor and meet building code regulations in your area is essential. By considering all available options for fastening baseboards, you’ll be able to achieve professional-looking results without compromising on functionality or safety concerns.
FAQs
1. How crucial is it to perfectly install baseboard trim?
Nailing baseboard trim is important for both aesthetic and functional reasons. Besides providing a seamless transition between the floor and wall, properly installed baseboards hide imperfections and gaps. It enhances the overall appearance of a room.
Additionally, they protect walls from damage caused by furniture, vacuum cleaners, and foot traffic. Neglecting to nail baseboards securely can result in unsightly gaps, uneven surfaces, and potential tripping hazards.
Attention to detail during installation ensures a professional finish, adding value to any space while preventing future maintenance issues.
2. What techniques yield the best results for securing baseboards with nails?
The best technique for nailing baseboards involves careful preparation and precise execution.
Start by measuring and cutting baseboards to fit the desired length, ensuring tight joints at corners.
Next, use a stud finder to locate and mark wall studs, providing sturdy anchoring points for the nails.
Position the baseboard against the wall, ensuring it sits flush with the floor.
Then, using a hammer or nail gun. Then drive finishing nails at an angle through the baseboard into the wall studs, spacing them evenly along its length.
Finally, fill any nail holes with wood putty and sand smooth for a flawless finish.
3. Which nail gun model is optimal for attaching baseboards?
When selecting a nail gun for baseboard installation, consider factors such as nail size, power source, and ease of use. A finish nail gun is ideal for most baseboard projects, as it provides enough power to drive nails cleanly through the baseboard into the wall without damaging the material.
Pneumatic nail guns, powered by compressed air, offer consistent performance and are well-suited for professional contractors.
However, for DIY enthusiasts or occasional users, electric or battery-powered nail guns provide convenience and portability without needing an air compressor.
Whichever type you choose, ensure it is compatible with the nail size recommended for your baseboards.
4. What’s the proper method for fastening baseboards to molding using nails?
Nailing baseboards to molding requires precision and attention to detail to achieve a seamless and professional finish.
Start by mitering the ends of the baseboards to create tight, 45-degree angles at inside and outside corners.
Next, apply wood glue to the mitered joints for strength and stability. Position the baseboards against the wall and molding, ensuring they are flush with both surfaces.
Then, using a nail gun or hammer, drive finishing nails through the baseboard and into the wall studs, angling them slightly toward the molding for a secure hold.
Repeat the process for each baseboard section, maintaining consistent spacing and alignment for a flawless result.
5. What are the appropriate dimensions for nails used in baseboards (thickness and length)?
When selecting nails for baseboards, it’s essential to consider both thickness and length. Typically, standard baseboards are installed using nails between 15 and 18 gauge thickness.
For thickness, aim for nails around 2 to 2.5 inches in length. These dimensions ensure sufficient strength and stability to secure the baseboards firmly to the wall without risking splitting or damage. Choosing the right size nails ensures a professional finish and longevity for your baseboard installation.
6. Which nail gauge is recommended for securing baseboards?
The appropriate gauge nails for baseboards play a crucial role in their installation. For most baseboard projects, a gauge between 15 to 18 is recommended. This range provides the necessary strength to hold the baseboards securely in place without causing damage.
Nails with a higher gauge are thinner and more delicate, while those with a lower gauge are thicker and sturdier. Choosing the correct gauge ensures that the nails effectively penetrate the baseboard and anchor securely into the wall, resulting in a durable and polished finish.
7. What’s the ideal nail size for affixing baseboards?
Selecting the correct size nail for baseboards is vital for a successful installation. Typically, nails ranging from 15 to 18 gauge are suitable for securing baseboards. These gauges strike the right balance between strength and manageability, ensuring a secure attachment without damaging the material.
Additionally, consider the length of the nails, aiming for 2 to 2.5 inches to accommodate the baseboard’s thickness and securely fasten it to the wall. By choosing the appropriate nail size, you’ll achieve a professional-looking finish while ensuring the longevity of your baseboard installation.
8. What size Brad’s nails are suitable for baseboard installation?
When determining the size of brad nails for baseboards, it’s crucial to consider both gauge and length. Opt for Brad nails with a gauge between 15 to 18 for standard baseboard installations. This range offers the necessary strength to secure the baseboards firmly without splitting the wood or causing damage.
Additionally, ensure the length of the brad nails matches the thickness of the baseboards, typically around 2 to 2.5 inches. By selecting the right size brad nails, you’ll achieve a seamless and secure attachment, resulting in a polished finish for your baseboard project.
9. What are the steps for filling nail holes in baseboards?
Filling nail holes in baseboards is a straightforward task with the right approach. Begin by selecting a quality wood filler that matches the color of your baseboard. Using a putty knife, apply the filler generously into each nail hole, ensuring it’s slightly overfilled.
Once dry, sand the filled areas gently until smooth, blending them seamlessly with the surrounding baseboard surface. Wipe away any excess filler and finish by painting or staining the baseboard to match the existing color. This simple process restores the appearance of your baseboards, leaving them looking flawless.
10. How do you determine the most suitable nail gun?
Selecting the right nail gun is crucial for efficient and precise woodworking projects. Begin by assessing your project requirements and the types of materials you’ll be working with. For heavier-duty tasks like framing, a pneumatic framing nailer offers power and speed.
Conversely, for finer, more delicate work such as trim or molding, a finish nailer is preferable. Consider factors like nail size compatibility, magazine capacity, and ergonomics when choosing a nail gun.
Additionally, prioritize safety features like trigger locks and depth adjustment mechanisms. With careful consideration, you’ll find the perfect nail gun for your needs.
11. What nail sizes are appropriate for securing baseboard trim?
Choosing the correct nail size for baseboard trim ensures a secure and professional finish.
Due to their strength and versatility, 16-gauge finish nails are commonly used for standard baseboards. These nails provide ample holding power without risking splitting the trim.
However, an 18-gauge brad nailer may be more suitable for thinner or more delicate trim pieces. The smaller diameter of 18-gauge nails reduces the risk of visible holes and damage to the trim.
A 23-gauge pin nailer offers minimal impact and excellent holding power, leaving virtually invisible holes, making it ideal for ultra-fine work or attaching delicate moldings.
16 Gauge Finish Nailer: A 16-gauge finish nailer is a versatile tool suitable for various woodworking tasks, particularly those involving baseboards, crown molding, and trim installation.
Its slightly thicker nails provide robust holding power without the risk of splitting the wood. Ideal for attaching thicker materials securely, the 16-gauge finish nailer offers a balance between strength and minimal visibility, leaving behind neat, professional results.
18 Gauge Brad Nailer: An 18-gauge Brad nailer is a go-to tool for delicate trim work and finer woodworking projects. Its smaller, thinner nails reduce the risk of splitting delicate materials like baseboard trim while providing ample holding power.
Perfect for precision work, the 18-gauge brad nailer leaves behind minimal holes that are easily concealed, making it ideal for achieving a clean and professional finish.
23 Gauge Pinner: A 23-gauge pin nailer is the ultimate tool for precision woodworking, particularly when minimizing surface damage is crucial. With its ultra-thin pins, this nailer creates nearly invisible holes, making it ideal for attaching delicate trim, veneers, and other fine woodworking details.
While offering less holding power than larger gauge nailers, the 23-gauge pin nailer excels in leaving seamless, professional results without requiring extensive touch-ups or filling.
12. What’s the reasoning behind the thinness of nails used for baseboards?
Baseboard nails are designed to be thin for several reasons.
- Firstly, thinner nails reduce the risk of splitting the wood when they’re driven in.
- Secondly, they provide a cleaner finish, leaving minimal damage to the surface.
- Thirdly, thinner nails are easier to conceal, resulting in a more polished appearance once the baseboard is painted or stained.
- Lastly, thinner nails offer more flexibility, which is beneficial when attaching trim to uneven surfaces or around corners.
Overall, the thinness of baseboard nails is a deliberate choice to ensure both structural integrity and aesthetic appeal.
13. What’s the correct procedure for nailing baseboards into place?
Nailing a baseboard requires precision and care to achieve a professional finish.
Select the appropriate nail size, typically thin, to prevent wood splitting. Position the baseboard against the wall, ensuring it’s level and snugly fitted.
Use a hammer to drive the nails through the baseboard into the wall studs, spacing them evenly along its length.
To avoid denting the surface, hold the nail at a slight angle and tap it gently until it’s flush with the baseboard.
Repeat this process until all nails are securely in place, then fill any gaps with wood filler and sand smooth before finishing.
14. What are the risks associated with the size of nails used in baseboard installation?
Underestimating or overestimating nail size can pose various dangers in construction and carpentry projects.
Using nails that are too thin may compromise the structural integrity of the baseboard, leading to instability and potential damage over time.
Conversely, nails that are too thick can cause splitting or cracking of the wood, resulting in unsightly blemishes and weakened joints.
Additionally, incorrectly sized nails may need sufficient holding power, increasing the risk of the baseboard becoming loose or dislodged.
Therefore, it’s crucial to carefully consider the appropriate nail size based on the thickness and material of the baseboard to ensure a secure and durable installation.
Conclusion
Choosing what size nail for baseboard trim is essential to achieve a polished and professional finish. Using nails that are too small can result in unstable trim work and visible gaps while employing large or long nails can cause splits and cracking. It’s important to remember that different types of wood may require different nail sizes, as well as the length of the baseboard itself.
To determine the appropriate nail size for your baseboard project, it gets recommended to consult with an expert or reference manufacturer guidelines. Pre-drilling pilot holes before nailing can also prevent splitting and ensure a secure installation. By selecting the correct nail size and taking proper precautions during installation, you’ll achieve a flawless result that looks great and stands up against wear and tear over time.