

Table of Contents
In today’s fast-paced world, it’s more important than ever to carve out time for self-care and relaxation. One luxurious way to pamper yourself at home is by indulging in a soothing bath bomb experience. Instead of spending money on expensive store-bought products, why not try creating your personalized bath bombs? This comprehensive guide will cover everything you need to know about DIY bath bomb recipes, from selecting the best ingredients to mastering the art of crafting these fizzy treats.
Essential Ingredients for DIY Bath Bombs
Baking Soda: When combined with citric acid, the base ingredient provides a fizzing action.
Citric Acid: A key component that reacts with baking soda to create the effervescent quality of bath bombs.
Epsom Salt: Helps relax muscles and reduce inflammation, making bath time more therapeutic.
Oils: Besides these fundamental ingredients, essential oils can be added for fragrance and skin benefits.
Consider using lavender for relaxation, peppermint for a refreshing feel, or eucalyptus for respiratory support.
Coloring Agents: To make your bath bombs visually appealing, you can add coloring agents like mica powders or natural herbs.
Experiment with different combinations to create personalized bath bomb recipes that cater to your preferences.
Making DIY bath bombs at home allows you to customize your self-care routine while knowing exactly what goes into the products you use on your skin. By understanding the essential ingredients and their benefits, you can craft luxurious bath bomb recipes tailored to suit your needs.
Choosing the Right Scents for Your Bath Bombs
When selecting scents for your DIY bath bombs, consider essential oils like lavender, eucalyptus, or citrus for a relaxing and refreshing experience. These natural scents not only smell delightful but also offer various aromatherapy benefits.
- Lavender: Known for its calming properties, lavender is perfect for promoting relaxation and reducing stress.
- Eucalyptus: With its refreshing aroma, eucalyptus is great for clearing sinuses and relieving congestion.
- Citrus: Bright and uplifting, citrus scents like lemon or orange can help boost mood and energy levels.
Experiment with different combinations of scents to create unique blends that cater to your preferences. Remember to test the intensity of the scent before adding it to your bath bomb mixture to ensure a pleasant bathing experience.
Benefits of Adding Oils to Your Bath Bombs
Hydration: Adding oils such as coconut, jojoba, or olive oil to your bath bombs can help hydrate and moisturize your skin during bathing. This extra boost of hydration can leave your skin feeling soft and supple after soaking in the tub.
Aromatherapy: Essential oils like lavender, eucalyptus, or peppermint not only add a pleasant scent to your bath bombs but also provide aromatherapy benefits. These oils can help promote relaxation, reduce stress, and even alleviate muscle tension while you unwind in the soothing waters.
Skin Nourishment: Certain oils contain beneficial nutrients that can nourish and protect your skin. For instance, vitamin E in almond oil can aid in repairing damaged skin cells, while grape seed oil is rich in antioxidants that help combat free radicals.
By incorporating these oils into your bath bomb recipes, you are giving your skin an added layer of care and protection.
Step-by-Step Guide to Making Your Own Bath Bombs
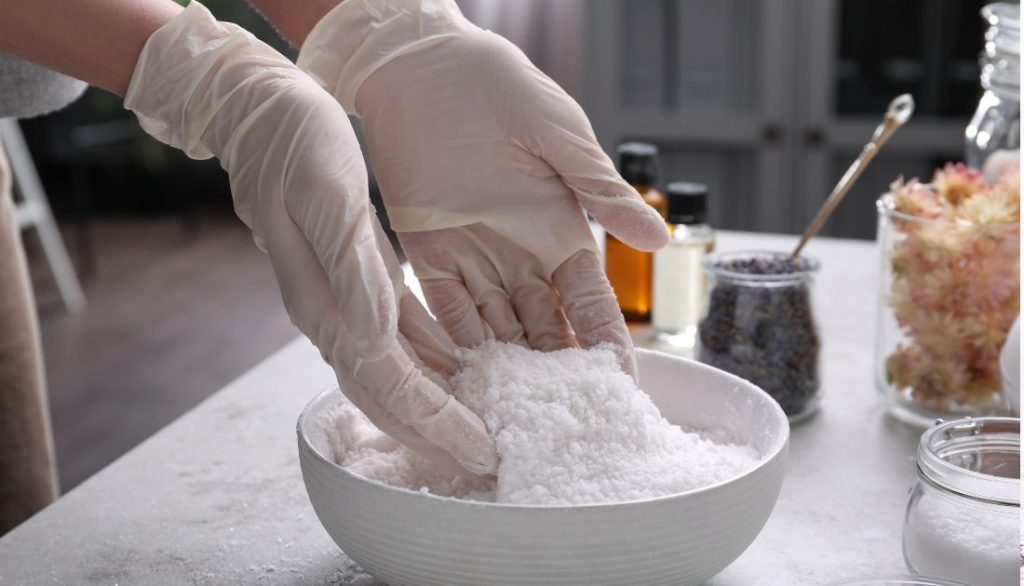
Gather Ingredients: Collect baking soda, citric acid, Epsom salts, cornstarch, essential oils, coconut oil, and water.
Mix Dry Ingredients: In a bowl, combine 1 cup of baking soda, 1/2 cup of citric acid, 1/2 cup of Epsom salts, and 1/2 cup of cornstarch.
Add Wet Ingredients: Pour three teaspoons of melted coconut oil and about 10 drops of your preferred essential oil into the dry mixture. Mix well until it reaches a sand-like consistency.
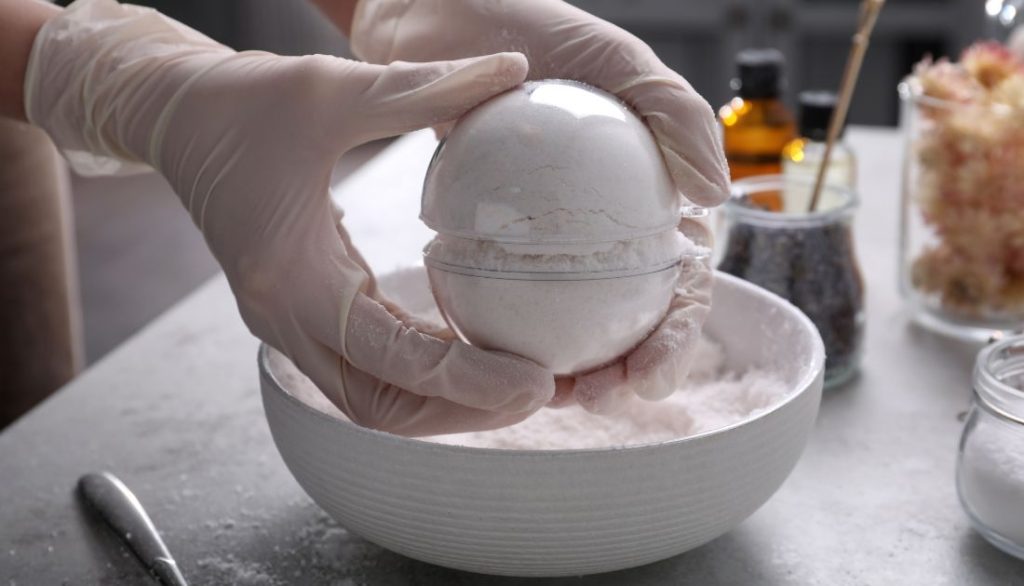
Mold the Mixture: Press the mixture firmly into bath bomb molds or small cups.
Let It Set: Leave the bath bombs to harden for at least 24 hours before carefully removing them from the molds.
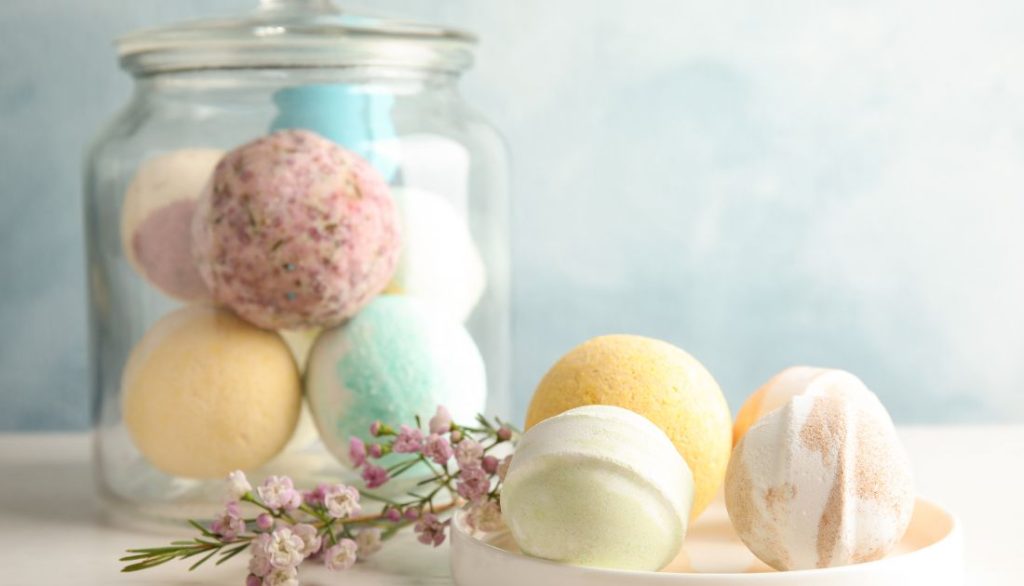
Enjoy Your Luxurious Bath Experience! Drop one of your homemade bath bombs into a warm tub and relax as it fizzes away, releasing soothing scents and nourishing ingredients for ultimate self-care bliss.
Tips and Tricks for Perfecting Your Bath Bomb Recipe
Choose High-Quality Ingredients: To create a luxurious bath bomb experience, opt for top-notch ingredients like Epsom salts, essential oils, and natural colorants.
Get the Consistency Right: Achieving the perfect texture is key. Ensure your mixture holds its shape when squeezed but still feels slightly crumbly.
Pack Tightly but Gently: Firmly press your bath bomb mixture into molds without over-packing or causing cracks. This ensures a smooth finish once they’re dried and ready to use.
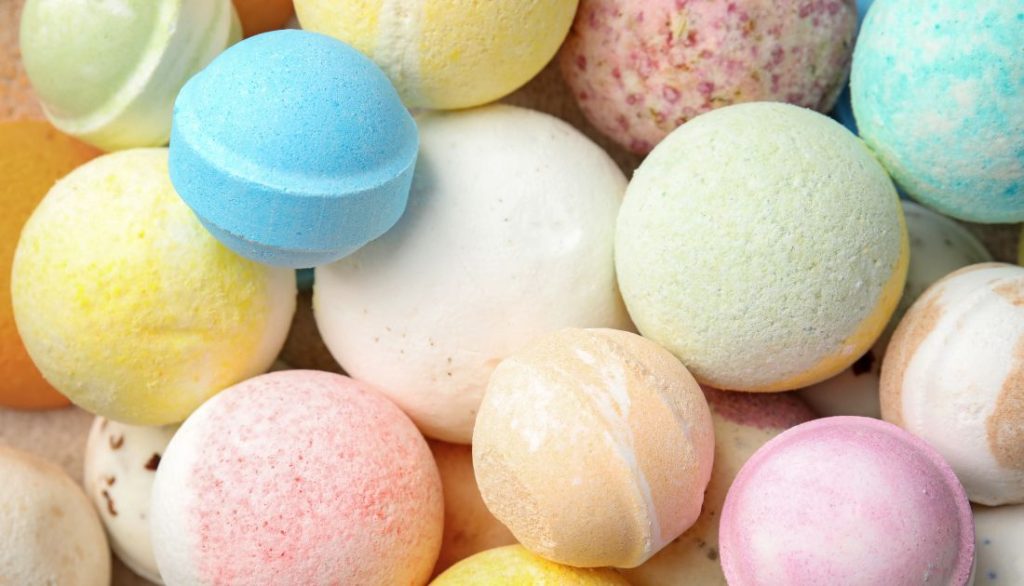
Creative Ideas for Customizing Your Bath Bombs
Enhance your bath bomb experience by adding unique touches that reflect your personality and preferences. Consider these creative ideas to customize your DIY bath bombs:
- Colorful Swirls: Experiment with vibrant hues by mixing different shades of food coloring or cosmetic micas to create beautiful swirl patterns in your bath bombs.
- Aromatherapy Blends: Infuse your bath bombs with essential oils like lavender, eucalyptus, or citrus for a personalized aromatherapy experience that promotes relaxation and rejuvenation.
- Herbal Additions: For added fragrance and therapeutic benefits, incorporate dried herbs such as chamomile, rose petals, or peppermint into your bath bomb mixture.
How to Store and Preserve Your Homemade Bath Bombs
- After creating your homemade bath bombs, store them in an airtight container to prevent moisture from getting in.
- Keep your bath bombs away from direct sunlight and humidity to maintain their freshness and effectiveness.
- To preserve your bath bombs for longer periods, store them in a cool, dry place like a cupboard or drawer.
Preserving Your Homemade Bath Bombs
- To extend the life of your homemade bath bombs, avoid exposing them to extreme temperatures that may cause them to crack or lose their fizziness.
- Use silica gel packets in the storage container to absorb excess moisture and keep your bath bombs intact.
- Check on your stored bath bombs periodically to ensure they are still fresh and fragrant before use.
Troubleshooting Common Issues with DIY Bath Bombs
Problem: The bath bomb mixture is too crumbly.
Solution: Add a small amount of additional liquid, such as water or witch hazel, and mix well until the texture becomes more moldable.
Issue: Bath bombs are not holding their shape.
Fix: Try using less liquid in your recipe and ensure you firmly pack the mixture into the molds before allowing them to dry.
Problem: Bath bombs are fizzing too quickly or not at all.
Solution: Check that your ingredients are fresh, particularly the citric acid and baking soda. Adjust the ratio of dry to wet ingredients in your recipe for optimal fizziness.
Gift Ideas: Packaging Your Bath Bombs for Loved Ones
When it comes to giving your homemade bath bombs as gifts, presentation is key. Consider packaging them in clear cellophane bags tied with a colorful ribbon for a simple yet elegant look. You can create custom labels with the scent and ingredients listed for a more personalized touch.
Another option is to place the bath bombs in decorative boxes or tins that the recipient can reuse. This adds to the gift’s aesthetic appeal and makes it environmentally friendly. Remember to include instructions on using the bath bomb so your loved ones can enjoy a relaxing spa experience at home.
To take your packaging up a notch, add dried flowers or herbs inside the box and bath bombs for an extra special touch. This will enhance the visual appeal of your gift and add a delightful fragrance to it. Personalize each package according to individual preferences for a thoughtful present that shows you care.
Relaxing Bath Bomb Recipes for Different Moods and Occasions
- Lavender and Chamomile Bath Bomb: For a calming experience, create bath bombs infused with lavender and chamomile essential oils. These scents promote relaxation and relieve stress, perfect for unwinding after a long day.
- Eucalyptus Mint Bath Bomb: Need a pick-me-up? Try making bath bombs with eucalyptus and mint essential oils. This refreshing combination will invigorate your senses and leave you feeling rejuvenated.
- Rose Petal Bath Bomb: Planning a romantic evening or wanting to indulge in self-love? Make bath bombs with rose petals for a luxurious experience that will pamper your body and mind.

Common Questions
1. What should I do if the bath bomb doesn’t release easily from the mold?
If the bath bomb doesn’t release easily from the mold, try tapping the sides of the mold gently with a spoon to loosen it. Place the mold in the freezer for about 10-15 minutes, which can help the bath bomb contract slightly and make it easier to remove. If you’re still having trouble, consider lightly oiling the mold before filling it next time.
2. What consistency should the mixture have before putting it into the molds?
The mixture should have the consistency of damp sand. When you squeeze a handful of the mixture, it should hold its shape without crumbling. If it’s too dry and powdery, add more liquid drops (water, witch hazel, or oil) until the right consistency is achieved.
3. Is it necessary to use citric acid?
Yes, citric acid is necessary for the bath bomb’s fizzing reaction when it comes into contact with water. It reacts with the baking soda to produce carbon dioxide gas, which creates the fizz. Without citric acid, the bath bomb will not fizz.
4. How long can bath bombs be stored?
Bath bombs can typically be stored for up to six months if kept in a cool, dry place. Over time, they may lose some of their fizzing power, but if stored properly, they should still be usable for up to a year.
5. What can I do if the mixture is too powdery?
If the mixture is too powdery, it may need more moisture. Add small amounts of liquid (water, witch hazel, or oil) and mix thoroughly until the mixture holds together when squeezed. Be cautious not to add too much liquid at once, as this can cause the bath bombs to start fizzing prematurely.
6. How long should I wait before removing the bath bomb from the mold?
Wait about 15-20 minutes before removing the bath bomb from the mold. This allows it to set slightly and hold its shape. However, some recipes might require a longer wait time, so it’s always a good idea to follow the specific instructions of your recipe.
7. How should I handle a bath bomb that cracks?
If a bath bomb cracks, you can try to re-mold it. Gently crumble the cracked bath bomb back into the mixing bowl, add a tiny bit of moisture if needed, and press it back into the mold. Allow it to set again before attempting to remove it.
8. What additional ingredients can I add to my bath bombs?
You can customize your bath bombs with a variety of additional ingredients. Popular choices include:
- Essential oils for fragrance and therapeutic benefits
- Dried herbs or flower petals for decoration and added scent
- Epsom salts for muscle relaxation
- Glitter or mica powder for a shimmering effect
- Food coloring or soap dye for vibrant colors
- Carrier oils like coconut or almond oil for moisturizing benefits.
When creating bath bombs, which ingredients should be avoided?
When making bath bombs, avoid using harsh chemicals, artificial dyes, and strong fragrances that can irritate the skin. Ingredients like sodium lauryl sulfate (SLS) can cause skin dryness and irritation for some people.
Additionally, avoid large or rough particles, such as coarse salt or sharp exfoliants, which can be abrasive. Preservatives and parabens should also be avoided, as they can harm sensitive skin and the environment.
9. Are there any issues associated with using baking soda and cornstarch?
Baking soda (sodium bicarbonate) and cornstarch are common ingredients in bath bombs, but they have some considerations. Baking soda is generally safe and helps soften water and skin, but it can be drying in high amounts. Cornstarch is used to add smoothness and bulk to bath bombs. Still, it can sometimes contribute to yeast infections, particularly in individuals prone to them, as it may create a favorable environment for yeast growth in bathwater.
10. What advantages does citric acid offer in bath bombs?
Citric acid is a crucial ingredient in bath bombs due to its role in the fizzing reaction. When combined with baking soda and added to water, it produces carbon dioxide gas, creating the signature fizz. Beyond the fun fizz, citric acid helps to balance the pH of the bathwater, making it more skin-friendly. It also has mild astringent properties, which can help to cleanse and tighten the skin, leaving it feeling refreshed and smooth.